
Rifle Shooting!
What’s your position?
All of us want the best accuracy from the different shooting positions we find ourselves in. Sometimes our shooting position is predetermined and sometimes we’re able to choose it. For you to choose the best one at any given time, you’ll want to have a good understanding of a few things.
Your shooting environment, your physical traits, and your abilities. To learn the benefits and limitations of each shooting position, you’ll need to know and develop your position skills. Also, you want to know the variations for each of them that works best for you.
This means you’re going to put yourself into each position and work them every which way you can until you own it! You don’t have to use them all, and that’s not the purpose of doing this. You just need to get a feel for your own body mechanics, ability, and skill level. Also, you will understand the benefits, and limitations to “you” as a shooter. They’re all different for each and every one of us. Everyone has a different capacity for maintaining a solid shooting platform in each of these positions.
I’ve experienced just about every shooting scenario imaginable in my career as a tactical long rifle operator, range instructor, and hunter. I understand the importance of comfort and stability while shooting from any position and maintaining on a target over extended periods of time. That being said, there are just some of these that are forced onto a shooter because of the environment or a need for immediate action.
Any long rifle operator will tell you there are only three basic positions to shoot from; Prone, Prone, and Prone!
Okay! so, actually we’re all familiar with the most common shooting positions:
Prone, sitting, kneeling, and standing (also called “offhand”). When considering these, understand this basic principle; The closer you are to the ground, and the more contact points you have, then the steadier you are.
This is true whether you’re service qualifying, game hunting, plinking steel, or competition shooting.
Remember that any and all shooting positions can be modified, or enhanced to the shooters traits. And I firmly believe all shooters should be comfortable and proficient in these four basic shooting positions.
Also, If an immediate action shot is required from any of these positions, a hasty sling can be used for stabilizing your shot.
Prone Position
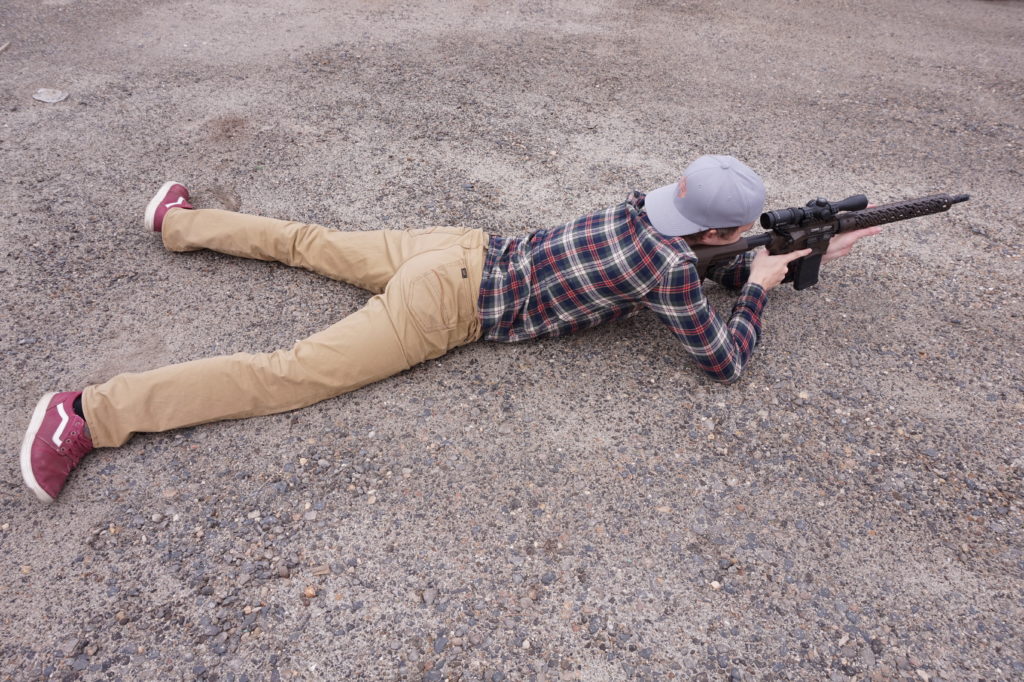
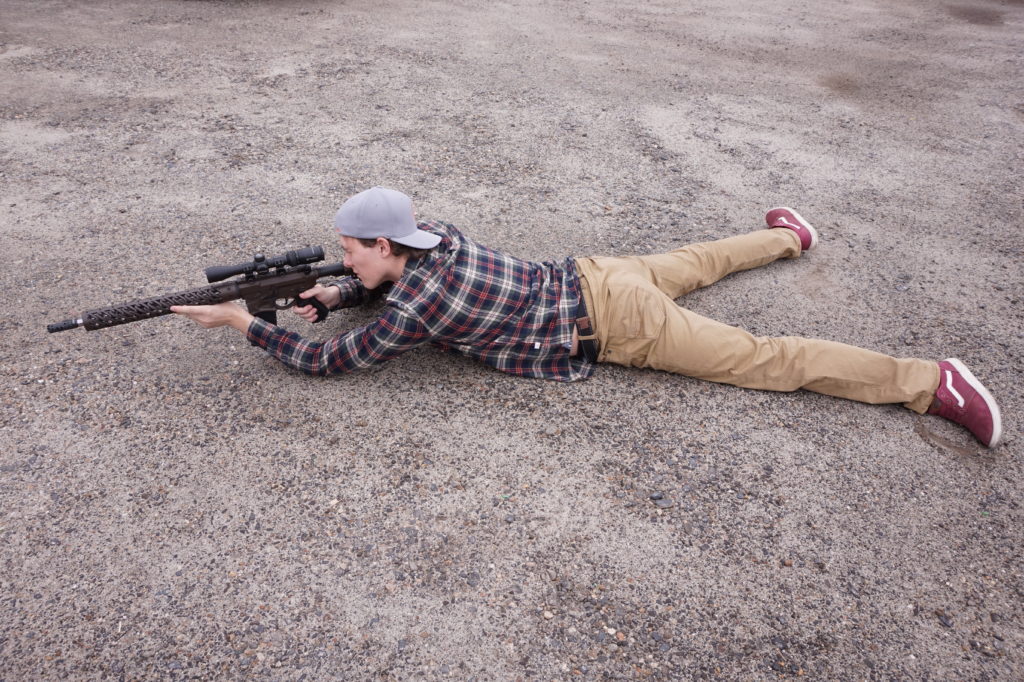
Prone is accomplished by lying down straight behind the rifle and maintaining as many contact points as possible with the ground. It’s simply the best. Your elbows, chest, midsection, thighs, and knees are all anchored to the ground, shooting mat, or another flat surface.
The old military prone has the body at an angle (left for righties, right for lefties). Tactical operators will lie down behind the rifle and pull themselves straight up behind it, to locate their ideal position with feet apart and flat as possible to the ground. This can be painful for some backs and hips, so a variation is to drag your strong side leg forward to the side and leave it slightly bent at the knee. Aids will include a bag, sling, monopod, or bipod, depending on terrain and shot necessity.
Try practicing these methods in a private, comfortable location with a safe and clear bolt open weapon. Start from a standing position and pick out your imaginary target while dropping down into the prone position. Pull yourself up into your rifle and determine your Natural Body Position relative to your Target (NoBoPiT–okay, I need help with the acronym). Close your eyes and relax, while allowing your body to shift slightly into its most natural and comfortable state of being…. or just find your Zen. Take two slow, deep breaths and open your eyes. As you look down range, you should still be aiming at the target. If you aren’t, then the position you’re in isn’t ideal for you. Don’t adjust your aim point, just shift your body position so that the muzzle points at the target. This is now your ideal body position while shooting prone. Remember this exercise the next time you assume any of your positions.
As an instructor, I would walk down the line and firmly kick each muzzle. If the shooter’s sight picture returns without shifting, then body alignment is good. If not, then the adjustment would be needed.
The old school NRA prone is fine, especially if you start with a good, solid body position as described above, then support the forend with a shooting bag, backpack, bipod, or other support. This will allow you to achieve a near bench rest stability.
Try to use your support hand as another contact point by snuggling it firmly against the buttstock and shoulder, or arm-V as shown in the example above. Don’t rest the rifle directly on a hard solid object like a boulder, but place a bag, pack, or other padded firm support underneath.
Prone is the best! Hands down! Without a doubt! Yet, it’s probably the least used by hunters. It just doesn’t allow the muzzle to rise high enough and clear some of the surrounding vegetation or obstacles.
Seated position
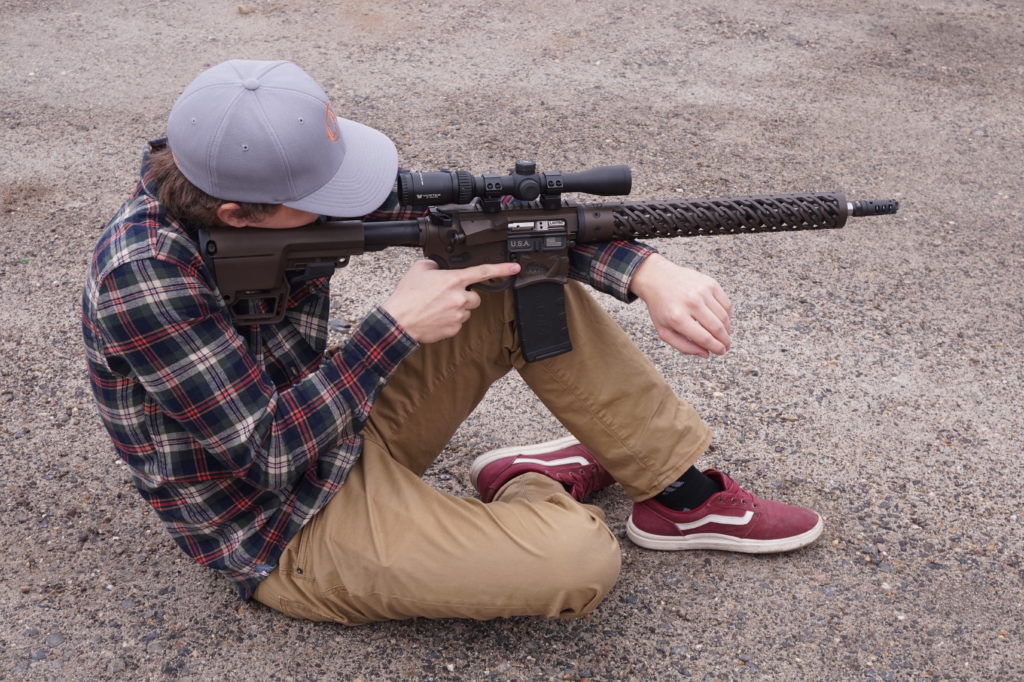
Sitting is difficult to master and you should be fit and flexible to make it a good option. You’ll want to be able to hold this position for a period of time. This position has three subcategories. Legs open, ankles crossed, and Indian style. The steadiest for me is with legs open, back of the elbows on the muscled part of the inner knees, and locked in. Ankles locked is simply a variation for stability. Sitting Indian style is similar to above, but it lowers your profile. These seated variations start with your legs crossed and your body about 45 degrees to the target. Keep the outside of your ankles flat to the ground and bend at the waist while leaning forward with elbows over and slightly in front or inside the knees. Elbows are tucked into the inside of the thighs, close to the knees and with as much bone to muscle, or muscle to muscle contact as possible.
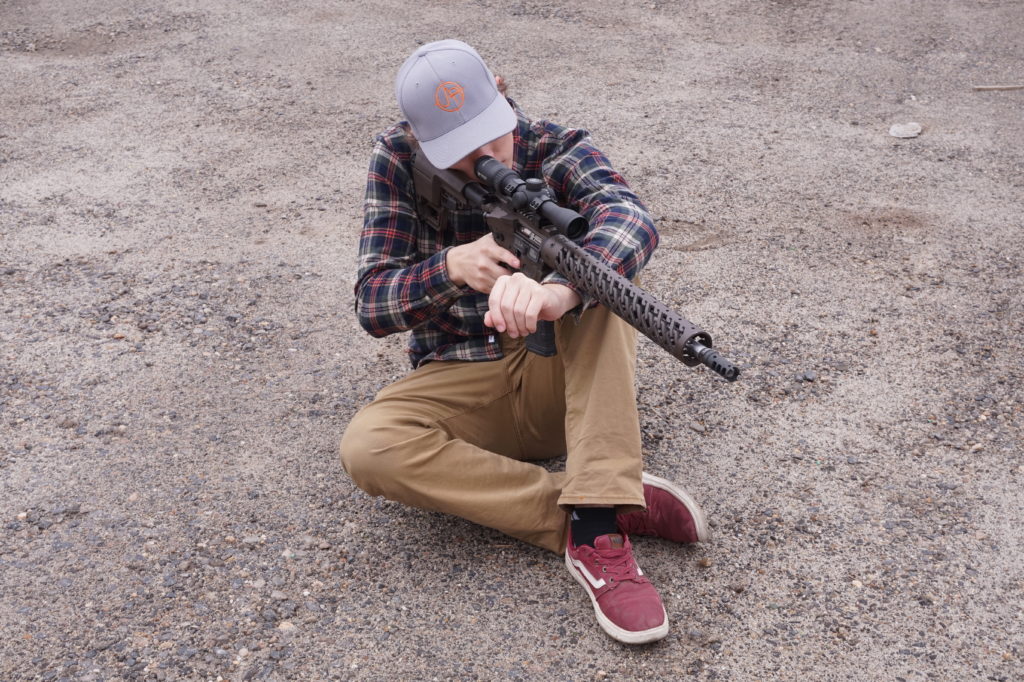
If your elbows rest directly on top of your knees it will create a less stable platform. Try some variations that may be faster to assume and easier to maintain. One of these is to bring the knees up, keep the feet more forward and flat on the ground, spread the legs about 45 degrees. This may not be quite as steady for some, but it’s easier and more comfortable for a longer period of time. Use the same eyes closed, target body positioning exercise as described for the prone position.
The sights should be aligned on the target, and the shooting hand is relaxed. Gently hold the pistol grip with your trigger finger relaxed and resting on the trigger guard. If you’re not pointed at the target remember to move your body position, not the muzzle.
Kneeling position
Kneeling is not nearly as steady as sitting…but it’s a lot faster and much better than standing.
Drop into position by pointing your weak side foot toward the target and bend it to allow the strong side knee to drop softly and slightly rearward to the ground.
Supporting elbow will be over slightly in front of the knee, but not directly on top. Again, you want to have bone to muscle or muscle to muscle for ideal stability and support. The strong side leg will be out about 60 to 80 degrees. You can sit on that foot, have it flat, or rest on the heel. Pull the stock firmly back into the shoulder, and much of the stability will come from supporting arm and sling.This is a good stable shooting position that you can get into very quickly. Try holding your shooting arm tucked in close or out slightly horizontal. Use whichever allows you the most stable, comfortable position. I use a more tucked position since it creates more contact points.
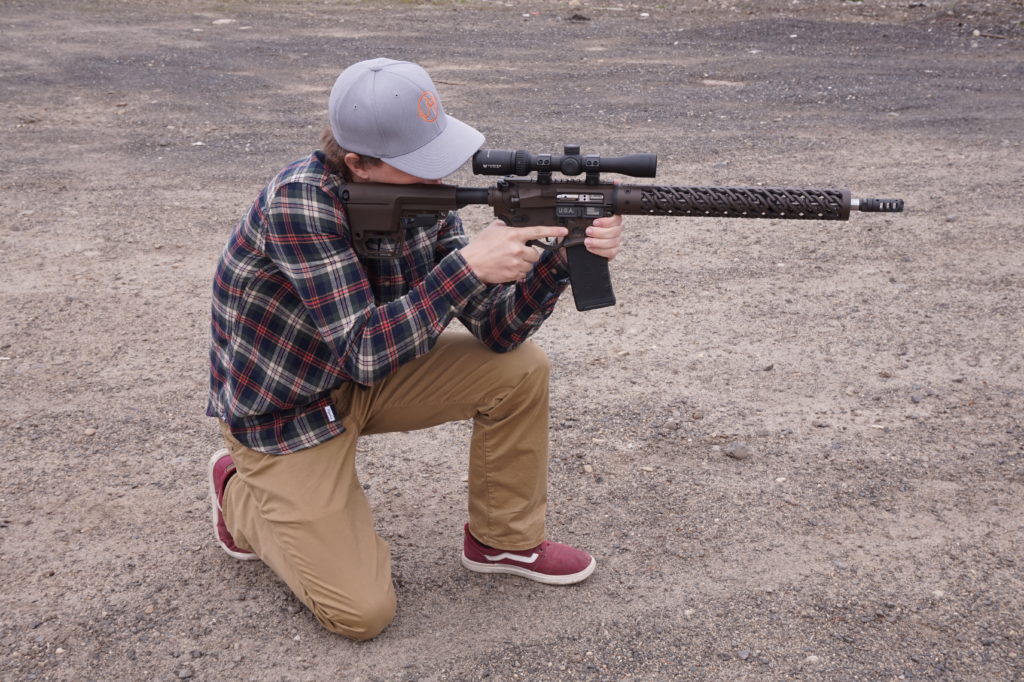
Notice how kneeling is slightly more elevated than the seated position. Now try raising your strong side butt cheek up and off your foot. Notice how much more elevation you get! This gives you eight to ten inches more in elevation that will make the world of difference for clearing tall grass or brush. This is considered the high kneeling position and has been very useful for me in the past. Unfortunately you will lose some knee support and stability for the forend and it’s more difficult to maintain over time.
You can practice these positions almost anywhere, and once you refine your skill, you should be able to drop into a kneeling position very quickly.
From here you can use a monopod, crossed sticks, tripod, or even a felled tree or boulder.
If you’re stuck in one of these positions for any length of time, make sure you pay attention to your body, especially before that body part starts screaming at you. Try moving your toes, feet, ankles, and legs slightly to avoid pressure points that cause you pain. Once you reach a certain point of discomfort, it’s more difficult to relieve while still maintaining that position.
Standing position
Standing is definitely the most undesirable position. It has the fewest stabilizing contact points and is commonly the least accurate for shooters. Sometimes it’s your only best option based on immediate action, your target, or your terrain. It requires the most practice to perfect and range time is the best way to master it.
Stand with your feet shoulder width apart and firmly seat the buttstock into the shooting pocket of your shoulder. Your weak side support elbow will be resting against the lower rib cage and the forward hip area. Your support hand will support the forend and you should be able to completely let go with your strong hand while still holding on the target.
The illustration depicts a wide wing stance, however, I prefer the tucked position with elbows inward, supported and locked against the torso. If your support hand is cupped to support the forend, it will provide more stability.
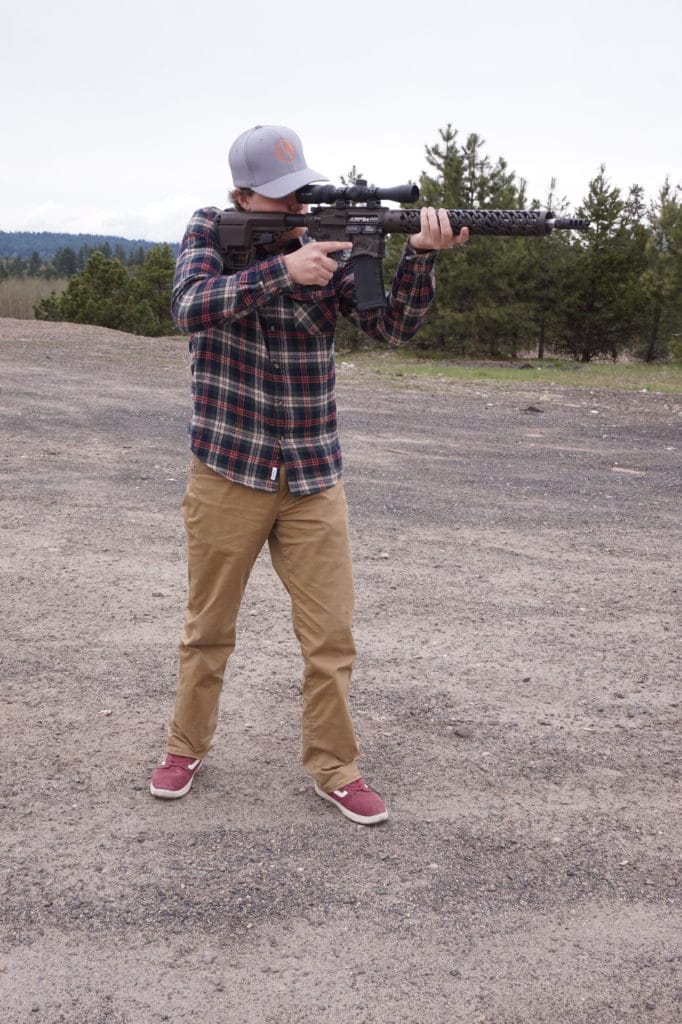
Your support side foot will be angled about 30 to 45 degrees beyond the direction of your target, which is dictated by your most comfortable and natural stance.
Shooting sticks tied together by ligature with paracord is a great shooting aid for this position. The fact is, almost anything you can do will improve this position. Like leaning on or against a natural rest like a tree, or using a branch or makeshift mono stick for support. You can use your partner’s shoulder to support the forend. Whatever your comfort range is for this position, sticks will double or triple it. You can even consider carrying two sets of sticks in your bag for forward and rear support.
You can get real creative finding ways to increase support and contact points in all of these shooting positions. Just remember to make them work best for you through experimentation and then own them through practice.
Next time we’ll talk in detail about all the different shooting aids available for every shooting position you might use. You’ll all have these basic positions mastered by then!
John-Unique-ARs