Barrel Nut Wrench for AR15/M16 Rifles allows the shooter to put the exact amount of pressure needed on the barrel nut while attaching barrel to the receiver.
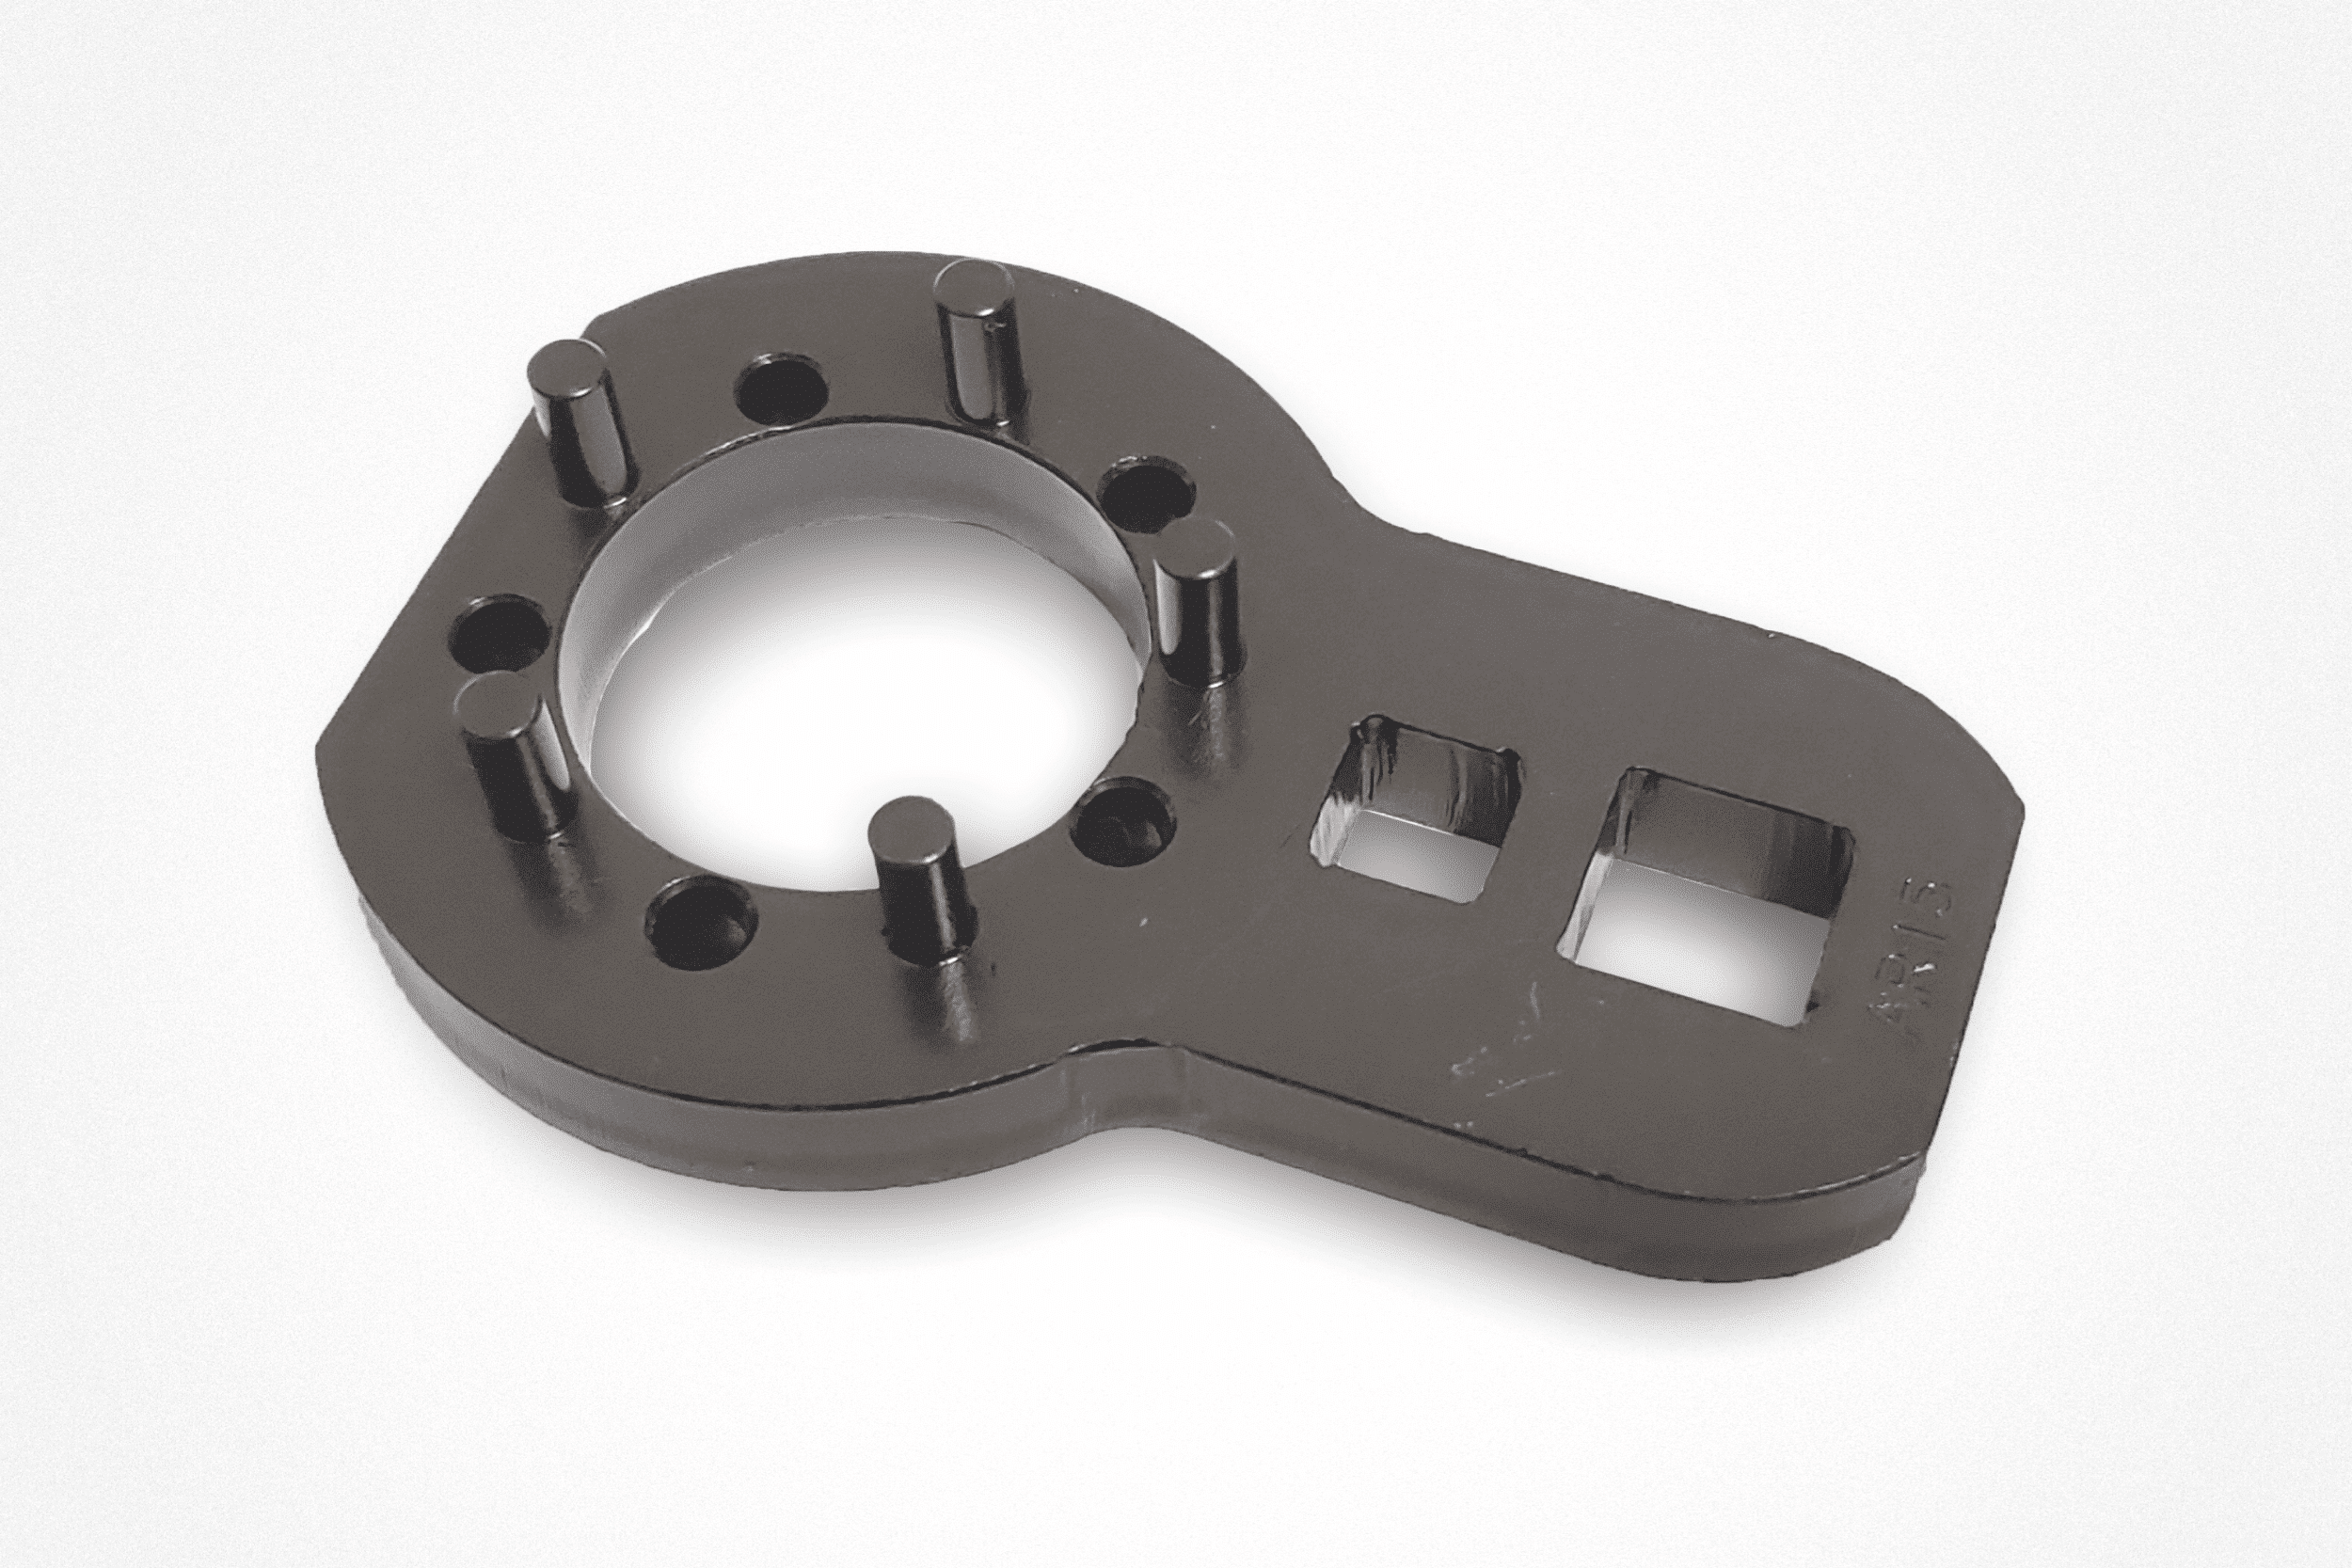
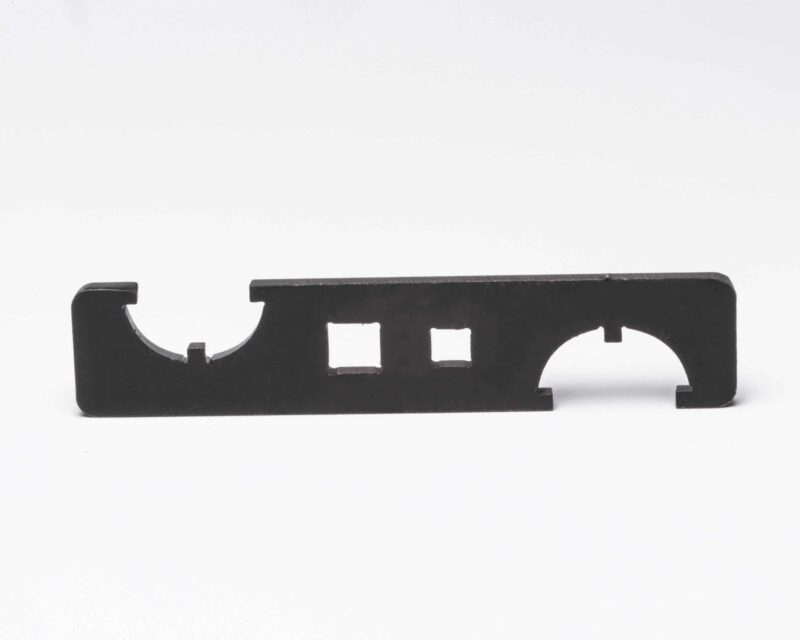
Slim AR15 Barrel Nut Wrench
$34.00
Barrel nut wrench for Slim barrel nut.
Warranty
Unique-ARs provides a lifetime limited warranty on all free float forends and tac rail. We warranty all materials and finishes will be free from defect. We want you to be more then satisfied with your precision parts and our customer service. We will do our best to make your experience dealing with our company a positive one, however we do not cover stripped or abused parts. Give us a call if you have any questions 888.982.8386.
Returns
Stock items may be returned at the shipping expense of the customer. A refund for the cost of the product only, minus a 10% re-stocking fee will be issued if the item shows no signs of wear or installation and can be resold as new. Shipping costs will not be refunded. We do not offer refunds on custom work including custom or upgraded paint options. A partial refund will be given on stock items with custom paint if the item can be resold as new.
Unique-ARs guarantees that you will receive the highest quality Cerakote painted handguard. Below is about the time periods that you can expect until your items ship:
Armor Black or Raw: ships in 3-5 business days
Single color: ships in 7-10 business days
Two or more colors: ships in 10+ business days
For Custom and Private Label Anodizing please allow an additional 4-8 weeks after the time of approval.
Raw or single color Cerakote Armor Black is included in the cost of the handguard(s). Anodized Black may affect production time and cost. There is a charge for Armor Black when in conjunction with any other color.
Each Cerakote color requires its own process, therefore we must charge for each color, including Armor Black when in conjunction with any other color.
*Bright Purple is available as a single color only*
For a full color chart please visit: http://www.cerakoteguncoatings.com/finishes/?tab=coatings&cat=HSERIES *Please Note: Every effort has been made to accurately represent the colors shown in this catalog. Colors may vary upon lighting conditions. Due to limitations of the printing process, photographic and printed images may not represent true color.
Grip installation instructions
1.Make sure weapon is unloaded.
- Remove upper receiver from the weapon and turn lower receiver upside-down.
- Using armory guidelines, remove existing grip from weapon making sure not to lose selector spring that will be exposed when the grip is removed.
- Remove selector spring from the old grip and insert into Unique-Grips. A small dab of grease on in the spring hole can help keep the spring retained in the Grip.
- Slip Unique-Grip onto lower receiver use D-ring on Unique-grip to lightly tighten the bolt onto receiver making sure that selector spring slides into detent hole.
- Once the Unique-Grips bolt is lightly tightened squeeze grip to form comfortable shape for your hand. Tighten bolt until grip retains desired shape. This step can be repeated until the Unique-Grip is a perfect fit for you.
- A couple of extra turns with a screwdriver will ensure grip does not change shapes. Don’t over tighten damage to receiver may occur.
- Test function of the selector after installation prior to test firing.
- Test fire the weapon prior to use in operational environments.
- Enjoy a completely custom Unique-Grip